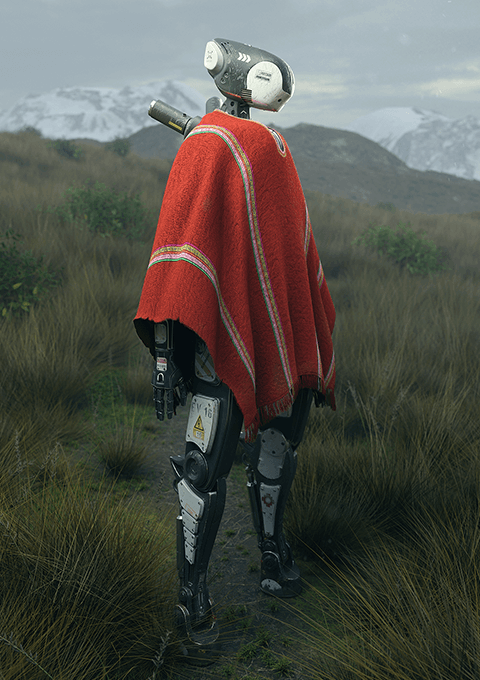
Blender Sculpting: Mastering Head Details with Fast Carve
🧐 Your Sci-Fi Character’s Head Still Looks Off? It’s All About the Sculpting Flow.
 You’ve followed every tutorial, applied the latest techniques, yet that crucial head sculpt feels… amateur. The proportions are almost there, but the details lack polish, and the separation between parts feels clunky. It’s a common roadblock. The truth is, the power isn’t just in knowing the brushes, but in leveraging workflow tools that let you iterate and refine rapidly.
💡 Three Pro Workflow Tweaks for Stunning Sci-Fi Heads
1. Embrace Non-Destructive Workflow with Fast Carve
The Fast Carve addon isn’t just for quick cuts; it’s about maintaining flexibility. Instead of immediately applying operations, uncheck “Apply Immediately” and “Delete After Apply.” This keeps your operations as modifiers, allowing you to non-destructively adjust the cut or boolean operation. You can easily tweak the cutter object’s position, scale, or even swap it out entirely before committing. This iterative approach saves immense time and prevents messy topology issues down the line, especially when defining distinct parts like the jaw or neck.
2. Master the Remesh for Sculpting Precision
After operations like “Slice” from Fast Carve, you’ll often end up with extremely dense or sparse polygons, which are terrible for detailed sculpting. The solution? Remeshing. Before diving back into sculpt mode, use the remesh functionality (Shortcut: Shift + R to set size, then Ctrl + R to execute). This rebuilds your mesh with a more uniform polygon distribution, perfect for smooth brush strokes and detailed sculpting. Think of it as giving your sculpt a fresh, clean canvas every time you make a significant geometric change.
3. The “Stabilized Stroke” Advantage for Clean Lines
Achieving crisp, intentional details, especially on mechanical or hard-surface elements, often comes down to precise line work. If your hand isn’t as steady as you’d like (and let’s be honest, most of us struggle with perfect straight lines!), activate “Stabilize Stroke” in the brush settings. This feature introduces a red guiding line that follows your cursor, smoothing out shaky movements and allowing you to draw clean, sharp edges, perfect for vents, seams, or facial features. It’s a simple toggle that makes a massive difference in the final polish.
🛠️ Key Skills & Details That Define Professional Quality
Creating compelling sci-fi characters involves more than just knowing how to use Blender and Photoshop. It’s about a workflow that allows for rapid iteration and refinement.
- Sculpting Fundamentals: Understanding brush dynamics is crucial. When refining shapes, use the Graph brush (
G) for broad adjustments and the Scrape brush (assigned toTin the script, though alternative assignments are wise) for flattening planes. Remember to use the Smooth brush by holdingShiftto blend strokes seamlessly. - Precision Cutting with Fast Carve: This addon is invaluable for segmenting your model. When using “Slice,” select the cutter object first, then the object to be cut. The “Apply Immediately” option speeds things up, but for non-destructive workflows, keep it unchecked to retain modifiers. This is key for defining separate components like the jaw or neck for better posing and detailing.
- Detailing with Intent: When adding smaller details like vents or panel lines, don’t place them randomly. Always align them with existing geometry or the overall design flow of your character. Use brushes like Draw Sharp (assigned to
Din the script) with Stabilized Stroke enabled for clean, precise lines. - Iterative Refinement: The process involves constant checking and re-checking. After significant geometric changes, remesh your model to ensure clean topology for further sculpting. Experiment with different shapes and forms, understanding that not every detail added during the draft phase will make it into the final render. This iterative process, combining broad sculpting with precise detailing and strategic use of tools like Fast Carve, is what elevates a draft to a production-ready asset.
💬 Frequently Asked Questions
Q. As a 3D Artist, how can I ensure my character sculpts have clean topology for sculpting after using boolean operations?
- After performing boolean operations like “Slice” with add-ons such as Fast Carve, the resulting mesh might have poor topology for detailed sculpting. The solution is to remesh the affected object. Select your object, enter Sculpt Mode, press
Shift + Rto adjust the remesh size (visualized by a sphere), and then pressCtrl + Rto perform the remesh operation. This creates a more uniform polygon distribution, ideal for smooth sculpting.
Q. As a 3D Artist, what’s the most efficient way to cut precise holes or separate parts of a model in Blender without destroying the mesh?
- Utilize the Fast Carve addon. Instead of directly applying destructive operations, use its slicing or difference functions. For a non-destructive approach, uncheck “Apply Immediately” and “Delete After Apply” in the Fast Carve panel. This keeps the operation as a modifier, allowing you to adjust or remove it later without negatively impacting your base mesh. Remember to remesh afterward if needed for sculpting.
Q. As a 3D Artist, how can I achieve sharper, cleaner lines for hard surface details on my character models, especially if my hand isn’t perfectly steady?
- The key is the “Stabilize Stroke” option found in Blender’s brush settings. When activated, it introduces a visual guide line (usually red) that smooths out your brush strokes. This is incredibly useful for drawing straight lines, curves, or complex patterns with greater accuracy, significantly improving the professional look of hard surface elements like panel lines, vents, or mechanical joints.