3D Character Skin: Why Your Renders Look Like Plastic & How to Fix It
🧐 The Frustration of Flat, Unrealistic Skin Materials
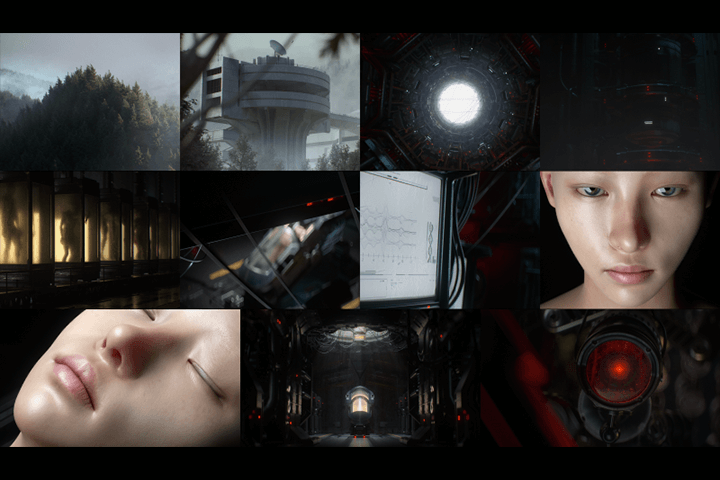 There’s that moment when your perfectly modeled character’s skin looks… off. You’ve applied the textures, tweaked the settings, but it still reads as flat, almost like painted plastic, not living tissue. The subtlety of light interaction with skin is complex, and mastering it often feels like chasing a ghost. Many artists struggle to achieve that essential translucency and depth, leading to renders that lack life.
💡 Expert Insights for Lifelike Skin Rendering
1. Master Subsurface Scattering (SSS) for Translucency
The fundamental issue with flat renders is the lack of translucency. Real skin isn’t opaque; light penetrates it, scatters, and emerges, creating that soft, lifelike glow, especially noticeable around thinner areas like ears or nostrils.
- The Fix: Implement Subsurface Scattering (SSS) correctly. In Cinema 4D, this often involves a mix of standard materials and dedicated SSS shaders.
- Key Technique: Use a Randomwalk SSS shader for realistic light scattering through the skin. Adjust the Density value (e.g., from 10 to 50) to control how deeply light penetrates. The Albedo color in the SSS shader should subtly influence the scattered light, often with a reddish tint.
- Pro Insight: Simply applying SSS isn’t enough; it needs to be controlled. Use a Dirt Node and invert its output with a Gradient Node to define where the SSS effect is strongest. This ensures areas like the ears and thin skin show translucency, while thicker areas remain more opaque.
2. Blend Textures for Realistic Surface Detail
The complexity of human skin isn’t just in its translucency but also in its surface variations – pores, subtle glossiness, and roughness. Relying on a single texture map won’t capture this.
- The Technique: Layer and blend multiple texture maps. For instance, a Roughness map determines how light scatters across the surface, controlling glossiness. A Normal map adds fine surface detail like pores and wrinkles.
- Workflow Tip: When the default Roughness map makes areas like the nose and lips too rough, invert it. By inverting the map (using a Color Correction Node’s ‘Invert’ option or a Gradient Node), you can make these areas more glossy, matching real skin’s subtle sheen. You might also need to adjust the Gamma value slightly for fine-tuning.
- Advanced Layering: Combine a primary Normal map with a subtle Micro-Normal map (like the one found in Marmoset Toolbag exports) using a Mix Texture node. This adds micro-details without overwhelming the primary surface information. Aim for very low values, around 0.01 to 0.015 for the transform values of the micro-normal map.
3. Refine Materials with Dynamic Adjustments
Achieving photorealism is an iterative process of observation and adjustment, especially when dealing with complex materials like skin. The interplay between different material channels needs careful balancing.
- Finishing Touch: Integrate the Specular map into the Coating channel of your material. This adds an extra layer of subtle reflectivity that mimics the natural oils and highlights on skin.
- Gradient Control: Instead of a simple Color Correction for inversions, use a Gradient Node. This allows for more nuanced control over how the SSS effect or other material properties are distributed across the surface, mapping different values to different areas based on the texture. Adjusting the gradient from white to gray shades helps fine-tune the SSS intensity.
- Iterative Refinement: Regularly view your material from different angles, especially with strong light sources, and enable the camera. Rotate the HDRI environment to simulate various lighting conditions. This reveals how the material behaves and guides further adjustments to the Gradient, Roughness, and Specular values until the desired lifelike quality is achieved.
🛠️ Key Skills & Details That Define Professional Quality
The script details a sophisticated approach to C4D material setup that goes beyond basic application. It highlights:
- Precise Texture Mapping: Correctly applying Albedo, Gloss (Roughness), Normal, and Specular maps is crucial. Understanding how each channel influences light interaction is fundamental.
- Node Editor Proficiency: Leveraging the Node Editor for materials allows for complex layering, blending, and procedural adjustments. This is essential for creating nuanced skin shaders that mimic real-world properties.
- SSS Implementation: The specific use of Randomwalk SSS and controlling its distribution with Dirt and Gradient nodes is a professional technique that elevates realism dramatically. It’s not just about having SSS, but about how and where it’s applied.
- Iterative Refinement: The process emphasizes that achieving lifelike skin is not a one-click solution. It involves constant observation under different lighting, adjusting values (like Gamma, Roughness, Specular), and comparing results from various angles.
- Understanding Material Properties: Recognizing that skin is translucent, not opaque, and that different parts of the face have varying levels of glossiness and roughness is key. This understanding drives the need for advanced layering and blending techniques.
💬 Frequently Asked Questions
Q. As a 3D Artist, how can I quickly identify if my skin material is too plastic-like?
A. A key indicator is the lack of subsurface scattering (SSS) and light penetration. If light hits the surface and bounces off uniformly without any soft glow or transmission, especially around thinner areas like ears when lit from behind, it’s likely too opaque and “plastic-like.”
Q. What’s the most crucial node for achieving realistic skin translucency in Cinema 4D, according to this 3D Artist’s workflow?
A. The Randomwalk SSS shader, combined with carefully controlled inputs like an inverted Dirt map fed through a Gradient node, is highlighted as critical. This setup precisely controls where and how intensely the SSS effect is applied, mimicking how light interacts with real skin.
Q. How does this 3D Artist suggest adding fine surface details like tiny hairs or pores to a character model?
A. For fine hairs, the technique involves applying a Vertex map painted with a brush, then using a Scatter object to distribute simple hair geometry only in the painted areas. For surface pores and wrinkles, detailed Normal maps, including micro-normal maps blended together, are used to add depth and realism to the material’s surface.