ZBrush Cartoon Character Modeling: Master Seihoon Kang’s Pro Techniques
🧐 Frustrated with Cartoon Character Sculpting in ZBrush? The Fix is Simpler Than You Think.
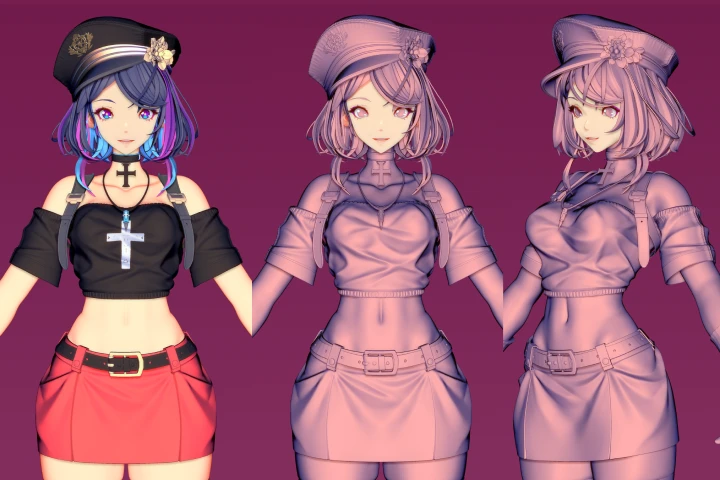 There’s a persistent challenge when aiming for that distinct cartoon aesthetic in ZBrush: achieving the right balance between stylized features and clean topology. Many hit a wall when trying to translate 2D charm into 3D form, especially with complex elements like clothing or hair. The key often lies not in mastering every obscure ZBrush feature, but in strategically applying a few core principles. This is where a focused workflow, honed by industry veterans, makes all the difference.
💡 3 Core Tips for Professional Cartoon Character Creation in ZBrush
1. Strategic Polygrouping and ZRemesher for Clean Forms
The foundation of any good sculpt, especially for cartoon styles, is clean topology. Instead of brute-forcing details on messy geometry, 3D Character Artist Seihoon Kang emphasizes the power of Polygrouping. For objects with hard surface elements, like the belt buckle or mechanical parts discussed, proactively dividing groups using ‘Groups By Normals’ is crucial. This allows ZRemesher to work intelligently. When using ZRemesher, always enable ‘KeepGroups’ and adjust the ‘Adaptive Size’ or target polygon count to maintain clean edge flow. Kang’s technique involves repeatedly halving the polygon count with ZRemesher until a simple, manageable base shape is achieved, ensuring control for subsequent detailing and beveling. This strategic approach prevents geometry issues down the line.
2. Leveraging ZModeler for Efficient Detailing and Beveling
Achieving crisp, clean edges and bevels is paramount for a polished cartoon look. ZBrush’s ZModeler brush is indispensable here. Kang frequently uses its ‘EdgeLoop Partial’ and ‘Bevel’ functions. For instance, to create a subtle bevel on an edge, he holds the edge with ZModeler (B, Z, M) and applies the Bevel. This provides a controlled, professional finish that separates hard surface elements. For connecting components, like the clip for the strap, the ‘Stitch’ function in ZModeler is invaluable. The critical insight here is that the available options for Stitch change significantly whether you select a vertex, an edge, or a polygon. Kang stresses the importance of carefully selecting the right point type to ensure the tool functions as intended, preventing errors and saving time.
3. The Power of ‘Crease PG’ and Strategic Subdivision for Refinement
Achieving smooth, rounded surfaces while maintaining sharp edges where needed is a hallmark of professional ZBrush sculpting. Kang’s workflow often involves using the ‘Crease PG’ (Crease Polygroup) function in conjunction with subdivision levels. After establishing a base form and using ZRemesher, he’ll apply Divide (Ctrl+D) to increase polygon count. Then, ‘Crease PG’ allows him to define sharp edges based on polygroups. Subsequent divisions will respect these creases. If a different area needs softening, a quick ‘UnCreaseAll’ can revert those creases. Kang advises using Divide strategically: increase it for detailed sculpting and decrease it (Shift+D) when making larger shape adjustments to avoid losing detail or introducing artifacts. He demonstrates this by dividing up to three times, then using ‘UnCreaseAll’ and dividing again to achieve the desired thickness and smoothness for parts like the belt.
🛠️ Key Skills & Details That Define Professional Quality
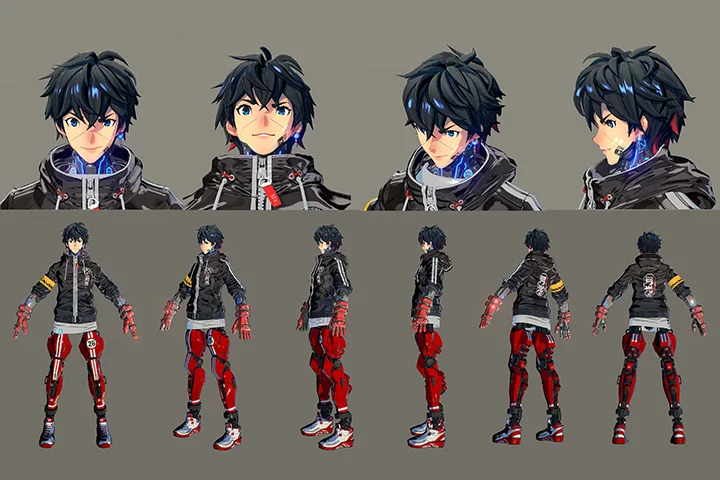
Kang’s approach to character creation in ZBrush is deeply rooted in practical, workflow-driven techniques. He emphasizes understanding the core silhouette of a character first, often using basic shapes like spheres and cubes as starting points. The symmetrical sculpting enabled by mirroring (pressing X) is fundamental, ensuring consistency from the outset.
Here’s how these principles translate into professional quality:
- Strategic Face Sculpting: For the face, Kang prioritizes establishing the fundamental egg-like shape and then using brushes like ClayBuildup (B, C, B) and TrimDynamic (B, T, D) to define key features. The DamStandard brush (B, D, S), or similar brushes like SK_Slash, are crucial for adding sharp edges, refining wrinkles, or defining the separation between elements like the ear and head. Kang notes that the placement of ears, typically aligning the top with the eye line and the bottom near the nose area, is a key proportion to get right early on.
- Efficient Workflow with Brushes: Kang highlights the utility of shortcut keys for rapid brush selection. Beyond the ubiquitous Move and Smooth brushes (accessible via Alt and Shift respectively), he frequently uses ClayBuildup for adding mass and TrimDynamic for flattening and sharpening edges. The Pinch brush (B, P, I) is used for tightening forms, especially useful for making the chin appear more defined or cinching areas. Understanding how each brush affects the surface, and mastering their shortcut keys, significantly speeds up the sculpting process.
- Mastering ZRemesher and Divide Levels: The interplay between ZRemesher and Divide is key to detail. ZRemesher is used to create clean, optimized topology from initial block-outs. Kang then utilizes ‘Divide’ (Ctrl+D) to add subdivision levels for finer sculpting. Importantly, he advises lowering the subdivision level (Shift+D) when making major shape changes to prevent data loss or distortion, then returning to higher levels for detailed work. This dynamic subdivision workflow ensures both precision and flexibility.
- Utilizing Materials and BPR for Stylized Renders: Kang stresses that the secret to a 2D cartoon look in 3D often lies in ZBrush’s material system and the Best Preview Render (BPR) feature. By creating custom materials and strategically applying BPR filters, artists can achieve distinct visual styles that mimic hand-drawn art. He demonstrates how to use materials to define color flats and how BPR settings can enhance depth and edge definition, crucial for that stylized appeal.
- Pose and Silhouette Emphasis: Throughout the process, Kang constantly checks the character’s silhouette from various angles. Achieving a strong, appealing silhouette early on is vital. He also shows how posing isn’t just an afterthought; it’s integral to showcasing the character’s personality and the effectiveness of the sculpting. Kang uses the ‘Transpose’ function to pose subtools, allowing for adjustments without affecting the entire model.
💬 Frequently Asked Questions
Q. How does 3D Character Artist, Seihoon Kang, recommend managing complex clothing details in ZBrush for cartoon characters?
A. 3D Character Artist, Seihoon Kang, emphasizes breaking down clothing into manageable Polygroups. He utilizes ZModeler’s ‘Bevel’ and ‘EdgeLoop Partial’ tools extensively for clean edges and details. For connecting separate clothing pieces or accessories, the ‘Stitch’ function in ZModeler is key, with careful vertex selection being paramount for successful execution. Strategic use of subdivision levels and ‘Crease PG’ helps maintain sharpness on edges while allowing for smoother fabric folds.
Q. What is 3D Character Artist, Seihoon Kang’s, advice for creating expressive cartoon faces with ZBrush?
A. 3D Character Artist, Seihoon Kang, focuses on establishing a strong, clean base shape using basic primitives and ZRemesher. He recommends using the ‘Move’ brush to capture the fundamental silhouette – often an egg shape with a more pointed chin for cartoon characters. Key features like eyes and mouth are blocked out early, with subsequent refinement using brushes like ‘ClayBuildup’ for volume and ‘TrimDynamic’ or ‘DamStandard’ for sharp edges and definition. Kang stresses the importance of checking proportions from multiple angles (front, side, top) and considering the overall character appeal rather than getting bogged down in perfection from the start.
Q. How can a 3D Character Artist effectively use ZBrush materials and BPR to achieve a 2D cartoon look, according to 3D Character Artist, Seihoon Kang?
A. 3D Character Artist, Seihoon Kang, highlights that ZBrush materials are crucial for achieving the 2D cartoon aesthetic. He advises creating custom materials that mimic flat shading or cel-shading by adjusting settings like ‘Modifiers’ (Intensity) and ‘Opacity’. The Best Preview Render (BPR) is then used with specific filter settings to enhance edge definition, control lighting, and mimic the look of 2D line art. Kang suggests experimenting with different material combinations and BPR render passes to find a style that complements the character’s design, rather than relying solely on sculpting.