From 2D Sketch to Stunning 3D VTuber: Master Anime Head Modeling
🧐 When Your 3D Character Heads Just Don’t Hit the Mark
 Following every tutorial step by step, only to find your 3D character’s head looks slightly off or lacks that professional polish? It’s a common roadblock. The issue often lies not in complex tools, but in the fundamental approach to shaping and detailing. Many artists struggle with achieving the clean, appealing silhouettes and natural volumes crucial for anime-style characters.
💡 3D Modeling Masterclass: Rui Ricia’s Workflow Essentials
1. The Power of the Plane: Sculpting the Anime Silhouette
The foundational step for anime head modeling is often simpler than expected. Using a plane and strategically subdividing it allows for precise control over the basic head shape. Rui Ricia emphasizes starting with a plane, dividing it into key facial zones (eyes, nose, mouth), and then mirroring to ensure symmetry. The crucial insight here is that this initial plane-based blockout defines the entire silhouette and proportion, making subsequent detailing much more manageable. It’s not just about drawing a shape; it’s about constructing the underlying form that dictates how light and volume will interact later.
2. Retopology for Radiance: Building Clean Geometry
Achieving that polished, professional look hinges on clean topology. Especially around the mouth and nose areas, where complex expressions will eventually be driven, meticulous retopology is key. Rui Ricia demonstrates how to dissolve unnecessary edges and rebuild faces using tools like Bridge Edge Loops and Merge by Distance. The goal is to create an all-quad mesh that deforms predictably. This workflow ensures that when you add subdivisions or blend shapes, the geometry holds its form without pinching or undesirable artifacts.
3. The Devil’s in the Details: Natural Volume and Proportions
Elevating a model from good to great often comes down to subtle adjustments. This involves carefully shaping the forehead, cheeks, and jawline to achieve a natural, appealing volume. Rui Ricia stresses the importance of constantly checking the silhouette from multiple angles and referencing the character sheet. A key technique is the judicious use of Subdivision Surface modifiers to smooth out the form, but the underlying polygon flow must be right first. Adjusting vertices with proportional editing, even by small amounts, can drastically improve the head’s overall aesthetic and ensure it aligns with the desired character style.
🛠️ Key Skills & Details That Define Professional Quality
The process of transforming a 2D concept into a 3D anime head is deeply rooted in understanding form and topology. Professionals meticulously plan their mesh flow, ensuring that critical areas like the mouth, eyes, and nose have sufficient edge loops for deformation. This allows for expressive facial animations without geometry collapsing.
- Symmetry and Mirroring: Always start with symmetry. Using the Mirror modifier from the outset ensures consistency and saves significant time.
- Strategic Subdivision: While the Subdivision Surface modifier is essential for smoothing, it’s best applied after establishing a solid base mesh. Over-reliance on it early can obscure fundamental topological issues.
- Edge Flow for Expression: Pay close attention to edge loops that follow facial muscle lines. For instance, loops around the mouth should follow the natural creases and curves for realistic lip syncing and expression.
- Volume Control: Mastering proportional editing and vertex manipulation is crucial for building natural head volume. This involves subtly pushing and pulling vertices to create rounded forms for the forehead, cheeks, and chin, avoiding overly flat or unnaturally sharp angles.
- Reference is King: Constantly comparing your model to the character reference sheet from all angles—front, side, and even top-down—is non-negotiable. Small adjustments in vertex position can dramatically impact the likeness and overall appeal.
💬 Frequently Asked Questions
Q. How does 3 Dcgcharacterartist Rui Ricia ensure the topology remains clean and quad-based throughout the modeling process?
A. 3 Dcgcharacterartist Rui Ricia emphasizes using retopology tools like Dissolve Edges and Bridge Edge Loops strategically. They also advise on rebuilding faces carefully, especially around areas requiring deformation, to maintain an all-quad structure. Merging vertices with Merge by Distance is also a key step to clean up the mesh.
Q. What’s the most common mistake beginners make when modeling anime heads, according to 3 Dcgcharacterartist Rui Ricia?
A. A frequent oversight is focusing too much on surface details before establishing a strong foundational shape and clean topology. 3 Dcgcharacterartist Rui Ricia highlights that the initial blocking with planes and proper edge flow is more critical than adding intricate details too early. If the base silhouette and topology are incorrect, adding detail will only accentuate the problems.
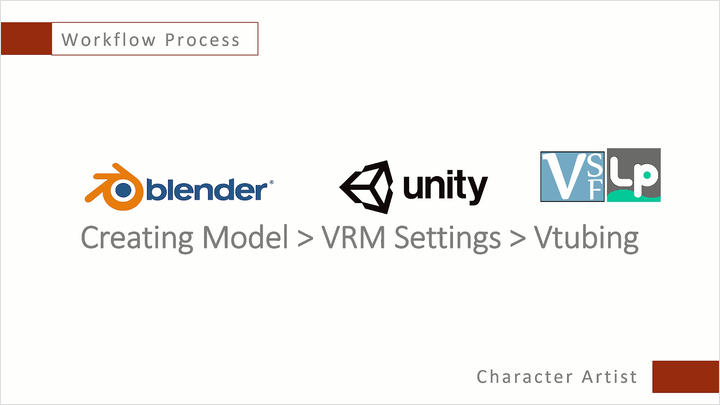
Q. How can 3 Dcgcharacterartist Rui Ricia’s techniques help in creating models for VTuber avatars specifically?
A. The techniques taught by 3 Dcgcharacterartist Rui Ricia are directly applicable to VTuber avatar creation. The focus on clean topology, natural facial volume, and precise detailing ensures the model will deform well for animation and blend shapes, which are essential for expressive VTuber performances. Understanding how to build a solid head base from scratch is fundamental for any character that needs to be brought to life digitally.