Mastering ZBrush: From Stylized Anatomy to Game-Ready Characters
🧐 The Frustration of Static Characters
 You pour hours into sculpting, but your characters still lack that spark of life. The anatomy feels stiff, poses are uninspired, and the final render just doesn’t pop. This isn’t about lacking talent; it’s often about missing the crucial workflow steps that separate amateur work from industry-ready assets.
💡 Expert Insights for Pro-Level Characters
Here are three foundational principles shared by seasoned 3D Character Artists that can significantly elevate your ZBrush workflow.
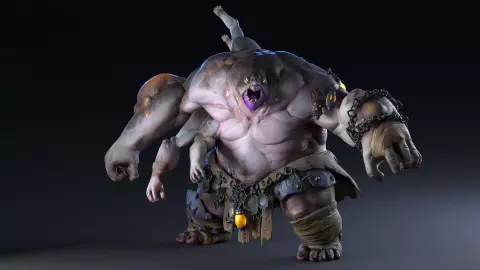
1. Building Believable Forms with Dynamic Topology
The key to strong character sculpting lies in how you manage your geometry from the start. Instead of getting bogged down by initial mesh limitations, leverage ZBrush’s Dynamesh for rapid form exploration and ZRemesher for clean, efficient topology. This approach allows for iterative sculpting without worrying about stretching polygons, enabling you to focus on silhouette, volume, and major anatomical landmarks first. It’s not just about learning the technique—it’s about shifting your mindset to prioritize form over initial detail.
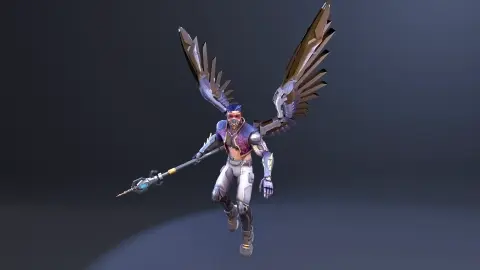
2. Posing with Purpose: Capturing the Narrative
A character’s pose is its silent story. Learn to use ZBrush’s Transpose Master not just to pose, but to communicate intention and weight. This involves understanding basic principles of gesture drawing, the line of action, and how to distribute weight realistically. Mastering this means your characters won’t just stand; they’ll act, adding a crucial layer of personality and dynamism essential for game-ready assets.
3. Polishing with Polypaint and PBR: The Final Polish
Achieving professional-grade renders goes beyond sculpting. Dive into ZBrush’s Polypaint for intricate, hand-painted textures that bring characters to life. Understanding PBR (Physically Based Rendering) concepts is vital here; it’s about how light interacts with surfaces. This means carefully considering color theory, value relationships, and applying materials that mimic real-world properties, whether it’s the sheen of armor or the subtle tones of skin. This final touch is what makes a model truly stand out.
🛠️ Key Skills & Details That Define Professional Quality
Translating raw sculpted forms into compelling game-ready assets requires a deep understanding of the entire pipeline. This goes beyond simply knowing ZBrush tools; it’s about workflow efficiency and a keen eye for detail.
- Concept to Creation Workflow: Learn how to develop initial character concepts from prompts, focusing on shape language and silhouette. This involves creating turnaround sheets and detail breakdowns, ensuring a solid design foundation before even opening ZBrush.
- Anatomy for Stylization: Study and sculpt stylized anatomy in ZBrush, understanding muscle flow and form exaggeration for artistic interpretation over strict realism. This practical application of anatomical landmarks defines your character’s silhouette and believability.
- Efficient Retopology: Master ZRemesher for creating clean, animation-friendly topology after your sculpt is complete. This step is crucial for game asset performance and further detailing.
- Texturing with Purpose: Apply base colors, gradients, and highlights/shadows using Polypaint, understanding how to create depth and richness. Explore color theory and learn to use blending modes for materials like metal or glowing elements.
- Presentation Matters: Utilize Marmoset Toolbag (or similar) with provided lighting and material setups to showcase your final model professionally. This final stage ensures your hard work is presented effectively for portfolios.
💬 Frequently Asked Questions
Q. How does a 3D Character Artist effectively use Dynamesh in ZBrush for initial blocking?
A. A 3D Character Artist uses Dynamesh to quickly establish the overall form and silhouette of a character without being constrained by polygon count or topology. By continuously rebuilding the mesh, they can focus on capturing the primary shapes and proportions, iterating rapidly until the core structure feels solid before moving on to more refined sculpting.
Q. What is the most impactful workflow tip a 3D Character Artist can adopt for posing characters in ZBrush?
A. The most impactful tip for a 3D Character Artist is to practice quick gesture drawings first. This helps internalize movement and balance. Then, applying these principles in ZBrush using Transpose Master, focusing on the character’s line of action and weight distribution, ensures poses feel dynamic and tell a story, rather than appearing static.
Q. How can a 3D Character Artist ensure their Polypainted textures translate well into PBR materials for game engines?
A. A 3D Character Artist ensures good PBR translation by understanding the fundamental PBR workflow. This involves not just painting colors but also considering how those colors will represent roughness, metallic properties, and emissive qualities. They focus on strong value contrast and defining material types clearly within the Polypaint stage, making the subsequent PBR material setup more intuitive and accurate.