Mastering Future Fashion: Bryant Nichols’s Essential Workflow Tips
🧐 That Frustrating Gap Between Digital Creation and Real-World Believability
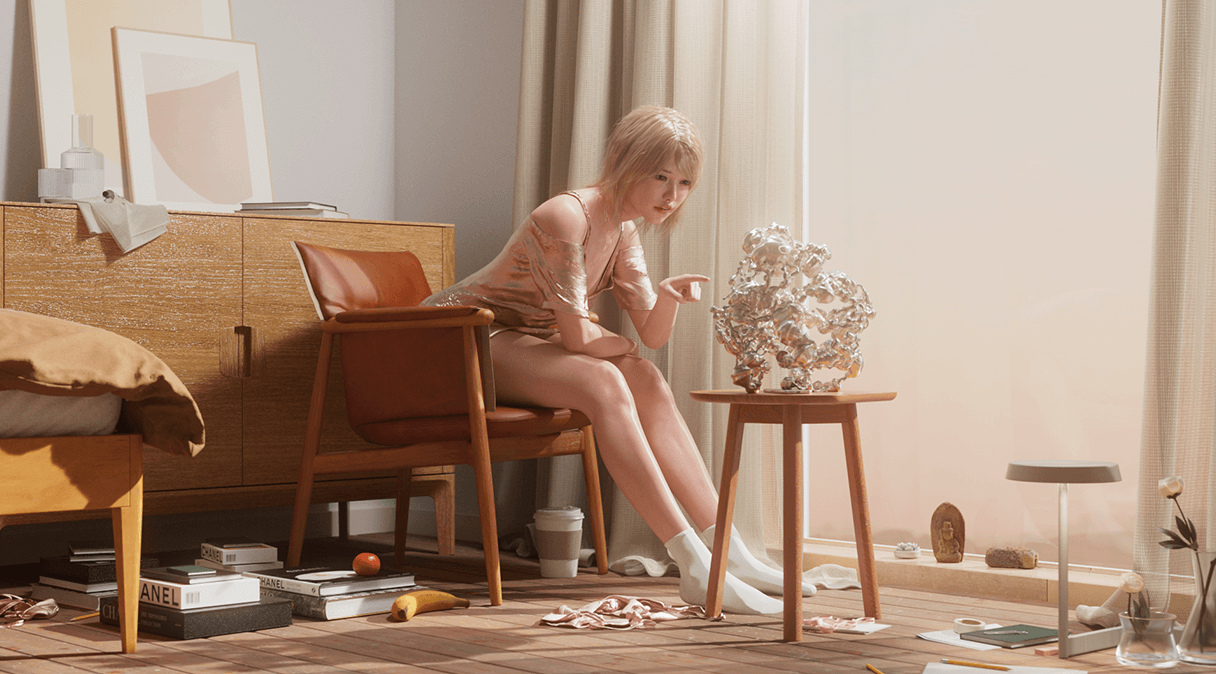
Getting that photorealistic look for 3D garments and characters can feel like chasing a ghost. You meticulously follow tutorials, tweak every setting, yet the final output still screams “digital” rather than “tangible.” Art Director Bryant Nichols noticed this gap too, especially when he was starting out, pulling fragmented knowledge from across the web. The struggle is real when you need a cohesive workflow from character setup to final render.
💡 Art Director Bryant Nichols’s Top 3 Workflow Boosters
Bryant Nichols shares his hard-won insights to bridge that gap, focusing on efficiency and polish. Here are three key areas to zero in on for more professional, believable results:
1. The Foundational Understanding: Real-World Garment Principles
Nichols emphasizes that true realism starts with understanding how real-world garments are constructed and fit. It’s not just about software buttons; it’s about grasping the underlying principles of fabric patterns, draping, and how they interact with the human form. This knowledge translates directly into more accurate and compelling digital creations.
- Tip: Dedicate time to studying actual garment construction. Analyze how patterns are laid out and how different fabrics behave. This fundamental insight will guide your digital pattern-making and fitting processes.
- Expert Insight: “It’s not just about learning the technique — it’s about shifting how you think about how clothes are made and worn.”
2. Streamlining Your Pipeline: Strategic Software Integration
The 21-part course covers a comprehensive workflow, from Daz 3D for character setup to Marvelous Designer for clothing and Cinema 4D with Redshift for rendering. Nichols highlights the importance of a seamless transition between these tools.
- Tip: Master the export/import process between Daz 3D and Marvelous Designer. Understanding how to correctly transfer your character model ensures your digital clothing fits and drapes as intended, saving significant rework later.
- Workflow Routine: Plan your character pose and garment type before exporting from Daz. This pre-planning dramatically speeds up the initial Marvelous Designer setup.
3. The Finishing Touch: Strategic Lighting and AOV Control
Achieving that final layer of polish often comes down to meticulous lighting and leveraging render passes (AOVs) for compositing. Nichols stresses that understanding how light interacts with different materials is crucial.
- Tip: Utilize Light Groups in Redshift. By assigning unique IDs (e.g., 1 for Dome Light, 2 for Garments, 3 for Skin) to your lights and rendering them as separate AOVs, you gain granular control during compositing in After Effects or Photoshop. This allows for precise adjustments to intensity or color for each light element without re-rendering.
- The Extra Step: Actively use the “Puzzle Matte” AOV. By assigning Object IDs to different elements (like your character’s garments or background), you create masks that enable targeted color correction and compositing adjustments, significantly enhancing the final image’s depth and realism.
🛠️ Key Skills & Details That Define Professional Quality
Art Director Bryant Nichols’s approach emphasizes practical skills that directly impact the final output’s believability and artistic merit.
- From Digital to Tangible: Nichols stresses the importance of understanding real-world garment construction. This means dissecting how patterns are made and how fabrics drape, knowledge that directly informs how you’ll approach pattern creation and fitting in Marvelous Designer. The goal is to translate that physical understanding into digital accuracy.
- Seamless Pipeline Integration: The course covers a robust workflow from Daz 3D to Marvelous Designer and Cinema 4D. A key takeaway is the efficient export/import process between Daz and Marvelous Designer. Getting this right ensures your digital clothing fits as intended, preventing time-consuming adjustments later on.
- Mastering Light and Shadow: Nichols’s lighting techniques focus on achieving a photographic quality. Experimenting with the GI (Global Illumination) settings, particularly using Brute Force for stills, can dramatically enhance realism by simulating how light bounces in a real environment, filling shadows and adding depth.
- Granular Compositing Control: Leveraging Redshift’s AOV (Arbitrary Output Variable) system is critical. By rendering elements like reflections, specular highlights, and especially Light Groups as separate passes, you retain maximum control for post-production. This allows for precise tweaks to color, intensity, and even texture mapping during compositing.
- The Power of Puzzle Mattes: Nichols highlights the utility of the Puzzle Matte AOV. Assigning unique Object IDs to different parts of your scene (garments, character body, environment) generates specific masks. These masks are invaluable for isolating elements in compositing software, enabling targeted color grading, saturation adjustments, or even relighting specific parts of the render without affecting the rest.
💬 Frequently Asked Questions
Q. Art Director Bryant Nichols, what’s the most crucial step in creating realistic 3D clothing?
The most crucial step is understanding the real-world principles of garment construction and fabric behavior. This foundational knowledge, applied within tools like Marvelous Designer, allows for more believable draping and fitting, which software alone cannot perfectly replicate without this user input.
Q. Art Director Bryant Nichols, how can I speed up my 3D fashion workflow?
Streamline your pipeline by mastering the export and import processes between your chosen software. For instance, accurately transferring your Daz 3D character model to Marvelous Designer with proper UVs and scale upfront saves significant time on garment fitting and adjustments.
Q. Art Director Bryant Nichols, what are some key lighting tips for making 3D renders look more realistic?
Utilize Global Illumination (GI) settings in your renderer, like Redshift. Enabling features such as Brute Force GI with sufficient bounces can simulate how light realistically bounces around a scene. This fills in shadows naturally and adds a layer of depth and subtle color fill that significantly boosts realism compared to purely direct lighting.
👉 Want to Go Deeper?
Discover the full scope of techniques and artistic insights Art Director Bryant Nichols shares.