💡 3 Essential Lighting Techniques from Character Designer Kevin Glint
1. Harness the Power of Clipping Masks and Multiply Mode
The trick to realistic lighting and shadows often starts with your layer setup. Using a clipping mask is non-negotiable for a clean, flexible workflow.
- How-to: Create a new layer above your base character layer, rename it “Light,” and then right-click on this new layer. Select “Create Clipping Mask.” Now, anything you paint will only appear on the pixels of the layer below. This prevents messy bleeds and keeps your work organized.
- Soft vs. Hard: For soft lighting, like sunlight hitting a curved surface, use a soft airbrush. A good rule of thumb is to never use 100% pure white for highlights; aim for around 90% to maintain depth. For shadows, create another clipped layer, set its blend mode to “Multiply,” and use a 50% gray color. This mode is designed to darken areas and works perfectly for casting shadows where light doesn’t hit.
2. Master Perspective for Believable Shadows
Shadows aren’t just random dark patches; they adhere to the same perspective rules as your character. Understanding this connection is crucial for grounding your character in their environment.
- Visualizing the Shadow: If your light source is coming from the front, shadows will naturally fall to the back. Use the “line tool” or “polygon tool” (set to 99 sides for a guide) to draw lines from your light source, angling them towards the ground. Where these lines intersect with the character’s form and the ground gives you a rough estimate of the shadow’s shape and direction.
- Shadow Properties: Remember that shadows close to the object are usually sharp and defined. As they extend further away from the object, they tend to disperse and become softer, blending more with ambient light. Use a soft airbrush to achieve this effect for distant shadows.
3. The Subtle Impact of Ambient Occlusion (AO)
Ambient occlusion adds that crucial touch of realism by simulating how light is blocked in crevices and tight corners where light has difficulty reaching.
- Where to Apply: This is not a dominant effect but a subtle one. Look for areas where light would naturally be excluded, like under the chin, in deep folds of clothing, or where parts of the character connect.
- Execution: For AO, create a new layer set to “Multiply,” and use a very soft, dark brush (almost black) to gently paint in these occluded areas. The key is subtlety; it should be a faint shadow, not a harsh one, enhancing the sense of depth and form without being overly noticeable.
🛠️ Key Skills & Details That Define Professional Quality
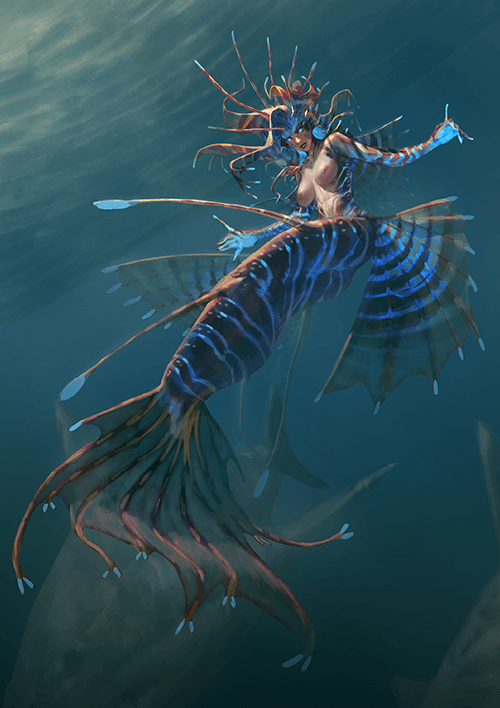
When it comes to professional character design, it’s the subtle details in lighting that truly elevate the artwork. Think about how light interacts with different materials—a shiny piece of armor will reflect light differently than rough fabric. Kevin Glint’s approach emphasizes understanding these nuances.
- Brush Control is Key: For highlights, an airbrush with varying opacity and flow is essential. For sharp shadows or defined edges on hard surfaces like cubes, a hard-edged brush is your go-to. The ability to switch between these and control their application with pressure sensitivity is what separates a beginner’s work from a professional’s.
- Workflow Efficiency: The use of layers, clipping masks, and blend modes like “Multiply” isn’t just about making things look good; it’s about creating a non-destructive workflow. This allows for easy adjustments and experimentation later on, saving significant time and effort. For instance, using the sphere layer to create shadows via Ctrl+Click (or Cmd+Click) and then transforming it is a neat shortcut that speeds up the process considerably.
- Understanding Light Sources: Whether it’s a direct sunlight simulation or a softer ambient light, understanding how each light source affects your character is paramount. By dissecting how light behaves—from key lights and rim lights to bounce light—you gain the ability to sculpt your character’s form convincingly and set the desired mood.
💬 Frequently Asked Questions
Q. As a Character Designer, how do I determine the best brush for shadows?
Answer: For soft surfaces, like spheres or organic forms, a soft airbrush is ideal for creating smooth, diffused shadows. For hard surfaces, such as cubes or geometric elements, a hard-edged brush will produce sharper, more defined shadows that accurately represent the form. The key is to match the brush type to the surface’s properties.
Q. Character Designer, how can I make my character shadows look more realistic?
Answer: Realistic shadows require understanding perspective and light direction. Shadows closest to the object should be sharp, becoming softer and more dispersed as they move away. Utilizing a “Multiply” layer with 50% gray and controlling the brush’s softness or hardness based on the distance from the object are crucial steps. Experimenting with the “Ctrl+Click” (or “Cmd+Click”) on the character layer to create a shadow shape and then transforming it can also provide a more accurate, perspective-driven shadow.
Q. Character Designer, what is the most efficient way to apply highlights without overdoing it?
Answer: When applying highlights, it’s best to use a clipped layer set to a “Normal” or “Screen” blend mode. Instead of pure white, use a lighter shade of your base color, or aim for around 90% white for a soft highlight. A soft airbrush is generally used to create smooth transitions, avoiding harsh edges unless the surface dictates it. This method allows for subtle control, ensuring highlights enhance form without looking artificial.